Starting Out?? Check out this Beginner’s Guide on how to set up a radio station studio!
Imagine waking up each morning to the sound of your own voice, broadcasting across the airwaves to listeners who tune in daily for their dose of news, music, and entertainment. The thought of running your own radio station might seem like a distant dream, but in today’s world, it’s more achievable than ever. Whether you’re an avid radio enthusiast or a beginner eager to dive into the world of broadcasting, setting up your own radio station can be an incredibly rewarding venture. We hope to help you further with this Beginner’s Guide to Radiostation Studio Setup
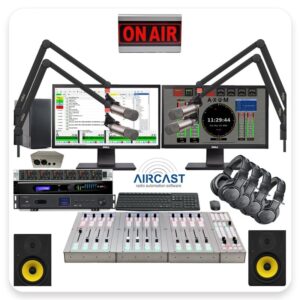
Starting a radio station is much like building a house. Just as you need a strong foundation to support the structure, your radio station needs essential equipment to ensure smooth and professional broadcasts. In this guide, we’ll walk you through the key pieces of equipment you’ll need to get started, providing practical advice and real-world examples to help you every step of the way.
We often get the question, “What is the price of a radiostation” There is no easy anwer fort hat as there are so many brands, possibilities and models on the market. But no worry, we are here to help you with al your broadcast endevours, Here you will find the anwers on all your questions about the Must-Have Gear for Your First Radio Station.
The Broadcast Console
The broadcast console, also known as a mixing board, is the heart of your radio station. It controls and mixes all audio sources, allowing you to manage microphones, music, and other audio inputs seamlessly.
It is basically the heart of the studio where all the magic happens. First of all we must make some choices:
- Types of Consoles:
- Analog Consoles: These are known for their warm sound quality and straightforward operation. They are often favored by traditionalists who appreciate the tactile feel of physical knobs and sliders.
- Digital Consoles: These offer advanced features like preset storage, digital effects, and computer connectivity. They are perfect for those who want a more modern, flexible setup.
- Features to Look For:
- Number of Channels: Determine how many audio sources you’ll need to manage simultaneously. More channels offer greater flexibility but come at a higher cost.
- Built-in Effects: Some consoles come with built-in sound effects and processing options, which can enhance the quality of your broadcasts.
- Connectivity Options: Ensure your console has enough inputs and outputs for all your equipment, including microphones, computers, and external audio sources.
What to choose?
- Which type of console suits your station’s needs? If you’re planning to have a simple setup with a few microphones and music sources, an analog console might be sufficient. However, if you anticipate needing more flexibility and advanced features, a digital console could be the better choice.Nowadays there are also small digital mixers.
- How many audio sources will you manage simultaneously? Consider the size of your team and the complexity of your shows. A small station might get by with a console that has fewer channels, while a larger operation will need more.
Examples Case Studies From Our Experiences:
- Small Community Radio Station: a small community radio station, opted for a 12-channel analog console. She enjoys the simplicity and reliability it offers, and with only a few hosts and audio sources, it meets all her needs perfectly. More budget? An affordable digital console is within reach nowadays.
- Community Radio station; This station has lots of shows with multiple guests in talkshows and uses a lot of resources for playout. They went for a 16 channel digital console with presets on which they can switch configurations easily and fast.
- University Radio Station: Mark, managing a bustling university radio station, chose a digital console with 16 channels. The ability to store presets for different shows and the advanced connectivity options have been invaluable for accommodating the station’s diverse programming.
By starting with a solid broadcast console, you’re laying the groundwork for a professional and efficient radio station. Think of it as the command center, where all the audio magic happens. As you continue to build your station, the right equipment will ensure that you’re always ready to deliver high-quality content to your listeners. Take a look at these examples here to find the perfect console for your project needs and budget.
Microphones
Microphones are the lifeblood of your radio station, capturing the voice and sound that your audience will hear. Choosing the right microphone is crucial, as it directly affects the clarity and quality of your broadcasts.
- Types of Microphones:
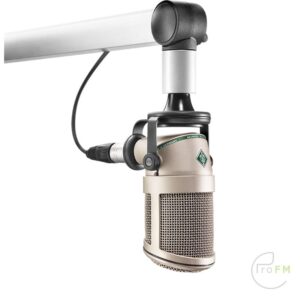
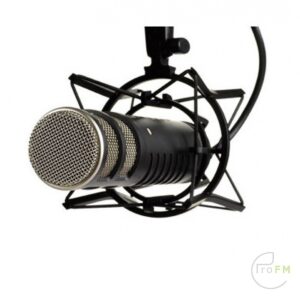
- Dynamic Microphones: Known for their durability and ability to handle high sound pressure levels, they are ideal for live broadcasting and loud sound sources. Popular choices include the Shure SM7B, Rode Procaster and the Neumann BCM 705.
- Condenser Microphones: These provide a broader frequency response and greater sensitivity, making them perfect for studio use where capturing fine details is essential. The Neumann BCM 104 and the Rode Broadcaster are great options.
- Choosing the Right Microphone for Different Purposes:
- Talk Shows and Interviews: Dynamic microphones are typically preferred for their robustness and ability to minimize background noise. Consider the Shure SM7B or Rode Broadcaster for its reputation in radio studios.
- Music and Voiceover Work: Condenser microphones excel here, providing the clarity and detail needed for musical performances and voiceovers. The Rode Podmic / Procaster are fantastic entry-level options, while the Neumann BCM 104 is a professional-grade choice.
- Microphone Accessories:
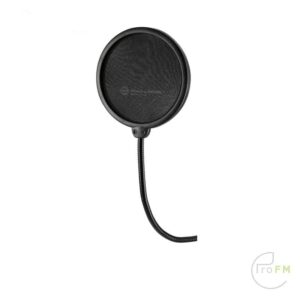
- Pop Filters: These are essential for reducing plosive sounds (like ‘P’ and ‘B’ sounds) that can cause unwanted noise in recordings.
- Mic Stands and Boom Arms: Ensure that your microphone is positioned correctly and comfortably. Adjustable stands and boom arms help maintain optimal mic placement, reducing handling noise.
What to choose?
- What is your primary content type? Are you hosting interviews, live shows, or recording music? Your choice of microphone will depend heavily on your content’s requirements.
- How to position and care for microphones? Proper mic placement and maintenance can significantly enhance your broadcast quality. Consider the microphone’s distance from the speaker’s mouth and use shock mounts to minimize vibrations.
Examples Case Studies From Our Experiences:
- Community Radio Station: A community station thrives with a mix of dynamic and condenser mics. She uses the Shure MV7 for talk shows and the Rode NT1-A for live music sessions. This combination has provided a perfect balance of durability and sound quality.
- Podcasting Setup: Alex, a podcast producer, swears by Rode PodMic Dynamic Broadcast Microphone the for its clarity and versatility. It’s ideal for both voice recording and acoustic music sessions, making it a staple in his home studio.
As you invest in your microphones, remember that they are not just tools but partners in your storytelling. Whether you’re capturing the subtle nuances of a live performance or ensuring crisp, clear dialogue, the right microphone will make all the difference in the world.

Headphones and Monitors
Headphones and monitors are essential for accurate audio monitoring during broadcasts. They help ensure that your audio levels are balanced and that any issues can be identified and corrected in real-time.
- Types of Headphones:
- Closed-back Headphones: These provide excellent isolation from external noise, making them ideal for live broadcasting where background noise can be a distraction. Examples include the Audio Technica ATH-M30X and the Audio-Technica ATH-M50x.
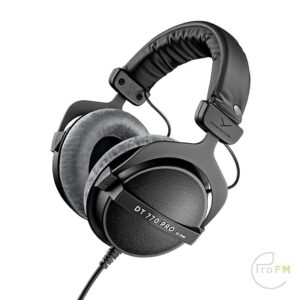
- Open-back Headphones: These offer a more natural sound and are typically used for audio editing and mixing rather than live broadcasts due to their lack of noise isolation. The Beyerdynamic DT 990 Pro is a popular choice.
- Studio Monitors:
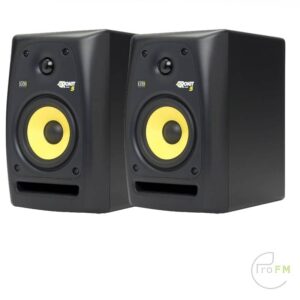
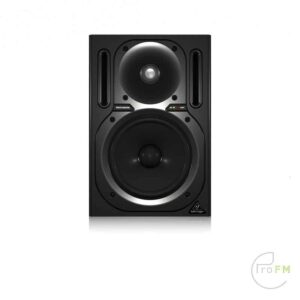
- Near-field Monitors: Positioned close to the listener to reduce room acoustics’ impact, they provide an accurate representation of the audio. The KRK RP5 G4 Active Studio Monitor Speaker
and Behringer Truth B2030A Ative monitor speakers are well-regarded options. - Positioning and Setup: Proper placement is crucial for accurate sound. Monitors should be at ear level and form an equilateral triangle with the listener’s head for optimal sound imaging.
- Near-field Monitors: Positioned close to the listener to reduce room acoustics’ impact, they provide an accurate representation of the audio. The KRK RP5 G4 Active Studio Monitor Speaker
Questions/Views:
- What’s the best way to set up monitoring for live shows? Consider using closed-back headphones to minimize external noise interference.
- Do you need both headphones and monitors? Each has its unique use case—headphones for isolated listening and monitors for mixing and mastering.
Examples Case Studies From Our Experiences:
- Small Internet Radio Station: Mike runs a small internet radio station and uses the Audio-Technica ATH-M50x for live shows due to their excellent noise isolation and sound quality. For post-production, he relies on KRK Rokit 5 monitors to ensure his audio mixes are precise.
- Professional Studio: Emily, a professional sound engineer, uses both Beyerdynamic DT 770 Pro headphones for editing and Genelec 8020 DPM monitors for mixing. This combination ensures she captures every detail accurately, providing high-quality broadcasts and recordings.
Headphones and monitors are your audio guardians. They help you maintain control over your broadcasts, ensuring that your sound is always clear, balanced, and professional. Investing in quality monitoring equipment is key to delivering the best listening experience to your audience.
Microphone Accessories
Accessories like pop filters, shock mounts, and mic stands are essential for enhancing microphone performance and ensuring professional-quality audio. These tools help minimize unwanted noise and improve overall sound clarity.
- Pop Filters:
- Function: Reduce plosive sounds (‘P’ and ‘B’ sounds) that can cause distortion.The K&M 23956 is a good chooice
- Types: Clip-on and gooseneck pop filters are common. A nylon mesh pop filter is a popular choice for its effectiveness and affordability.
- Shock Mounts:
- Function: Isolate the microphone from vibrations that can cause unwanted noise.
- Types: Universal shock mounts can fit most microphones, while specific mounts are designed for particular models.
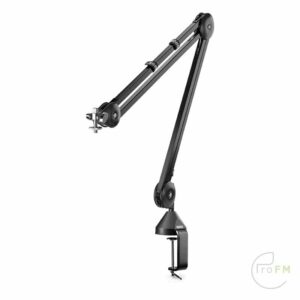
- Mic Stands and Boom Arms:
- Function: Ensure stable and adjustable positioning of the microphone.
- Types: Desktop stands are great for stationary setups, while boom arms offer flexibility and can be adjusted easily for different speakers.
Questions/Views:
- Why are accessories important for audio quality? Consider how each accessory can eliminate specific types of unwanted noise and improve overall recording quality.
- What accessories are essential for your setup? Depending on your broadcasting environment, some accessories might be more critical than others.
Examples Case Studies From Our Experiences:
- Small Home Studio: John, who records podcasts from his home studio, uses a basic nylon pop filter and a desktop stand. These simple accessories significantly improve his audio clarity, making his podcasts sound more professional.
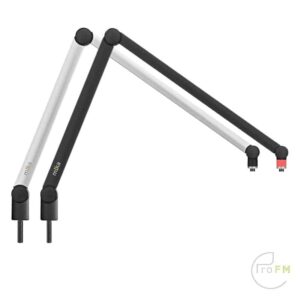
- Community radio: Larry runs a community station and uses just a few simple but effective mic booms like the Rode PSA1. Avoiding any unwanted sounds in the studio and adjustable for DJ and gust mics.
- Professional Radio Station: Lisa, working in a professional studio, relies on custom shock mounts and adjustable boom arms to ensure her microphones are always perfectly positioned and free from handling noise. All Yellowtec Mika Mic arms are a popular chooice
By investing in the right microphone accessories, you can significantly enhance your audio quality, ensuring that your broadcasts sound clear and professional.
Audio Interface
The audio interface connects your audio equipment to your computer, playing a crucial role in digital broadcasting. It ensures high-quality audio transmission and provides various input and output options.
- Features to Consider:
- Input/Output Options: Choose an interface with enough inputs for all your sources like your play out system.
- Latency: Low latency is crucial for real-time monitoring and broadcasting. Look for interfaces with strong driver support and minimal delay.
- Software Compatibility: Ensure the interface is compatible with your broadcasting and editing software.
- Common Interface Types:
- USB Interfaces: Widely used due to their ease of connection and affordability. The Focusrite Scarlett series is a popular choice among beginners.
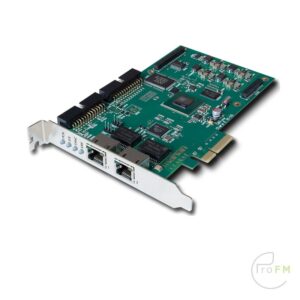
Dante Interfaces:Dante (Digital Audio Network Through Ethernet) integrates hardware and software that uses network protocols to deliver uncompressed, multichannel, low-latency digital audio transmission over a standard Ethernet network. It was developed in 2006 by an Australian company named Audinate - Thunderbolt Interfaces: Offer faster data transfer rates and lower latency, suitable for more advanced setups.
- USB Interfaces: Widely used due to their ease of connection and affordability. The Focusrite Scarlett series is a popular choice among beginners.
Questions/Views:
- How to choose an interface based on your station’s scale? A small station may only need a basic USB interface, while a larger station with multiple hosts and guests may require an interface with more inputs and advanced features or go all in AoIP with Dante. Keep in mind some console have internal USB and/ or Dante audio interfaces on board and you don’t have to buy the seperatly
- What’s the importance of latency in live broadcasting? High latency can cause delays in monitoring, which can be disruptive during live broadcasts.
Examples Case Studies From Our Experiences:
- Home Studio Internetradio: Anna, a home studio owner, uses the Angry Audio USB Audio Gizmo for its simplicity and reliability. It provides enough inputs for her microphone and guitar, and integrates seamlessly with her broadcasting software.
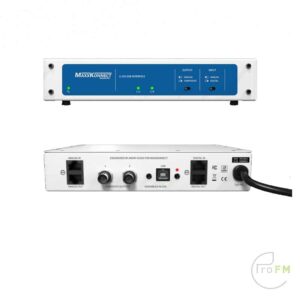
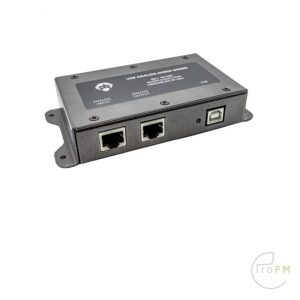
- Community Station : Larry community station works with the D&R Airence radiomixer which has 5 internal USB soundcards onboard, the use a Maxx Konnect U.192 USB soundcard to process there radio signal with Stereo Tool Audio Processing Software.
- Professional Radio Station: Tom’s professional radio station uses the Marian Clara E Dante Soundcard , benefiting from its superior sound quality and low latency, crucial for live interviews and performances.
By understanding the role and features of audio interfaces, you can ensure that your radio station’s digital audio chain is robust and reliable, providing crystal-clear broadcasts to your listeners
Audio Processing Equipment
Summary: Audio processing equipment like compressors, equalizers, and limiters can help refine your broadcast sound, ensuring consistent audio levels and quality.
- Compressors:
- Function: Reduce the dynamic range of audio, making quiet sounds louder and loud sounds quieter.
- Examples: The DBX 286s is a popular choice for mic – voice processing for its versatility and affordability.
- Equalizers (EQ):
- Function: Adjust the balance of different frequency components in an audio signal.
- Examples: Graphic EQs provide control over specific frequency bands, while parametric EQs offer more precise adjustments.
- Limiters:
- Function: Prevent audio signals from exceeding a certain level, avoiding distortion.
Questions/Views:
- How do you ensure consistent audio levels? Using a combination of compressors and limiters can help maintain a steady output level, enhancing listener experience. Depending on the purpose 9podcast, recording ) ou can also use an audio leveller for this.
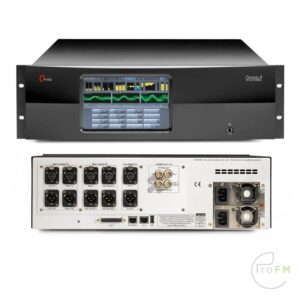
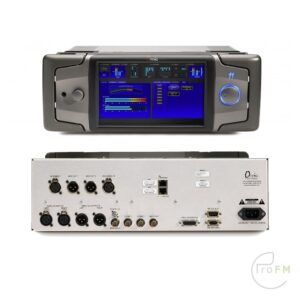
- What specific processing needs does your station have? Different content types may require different processing techniques for optimal sound quality. This also depend on which band you are broadcasting. There are broadcast audioprocessors for AM, FM and HD-DAB. Most broadcast audio processors have a “all in one box” solution; Audio levelling, compression/limiting and clipping and they give you a contant audio level without distortion which also keep your station within the legal limits of your license. Highly recommended.
Examples Case Studies From Our Experiences:
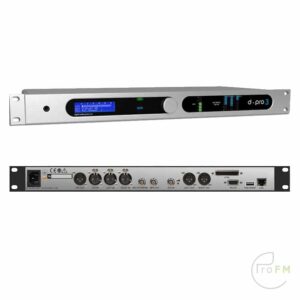
- College Radio Station: Sarah’s college radio station uses a DBX 286s compressor to ensure that all voices are clearly heard, regardless of their natural volume. They use a simple broadcast audio processor like the Itel Dpro3 to get a consistant sound
- Community Station : Using DBX 286A Voiceprocessors for therei mics and a proper FM audio processor like the Itel dPro6 for the complete station signal preventing audio peaks that could cause distortion during live broadcasts.
- Professional Commercial radiostation: They uses top of the bill audio processing equipment, often to create a brand with their sound. Loud and clear. the
- or Omnia.11 audio processor for example .
Investing in audio processing equipment helps polish your broadcast sound, making it more professional and enjoyable for your audience.
Radio Software
Broadcasting software is the backbone of your radio station, handling tasks like radio automation play out ,scheduling, audio processing and streaming.
- Types of Software:
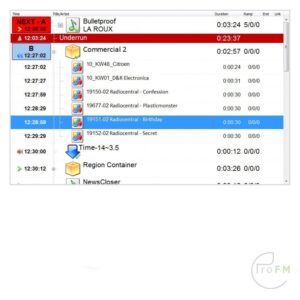
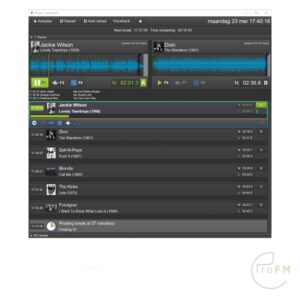
- Playout Software: Programs like D&R Aircast and Caliope OnAir Radio Automation software provide tools for live broadcasting, including audio mixing and scheduling.
- Streaming Software: OBS Studio and Mixxx are popular for their versatility and ease of use, allowing you to stream live audio to your listeners.
- Features to Look For:
- Automation: Automated scheduling and playback features can help manage your content efficiently.
- Integration: Ensure the software integrates well with your audio interfaces and other equipment.
- User Interface: A user-friendly interface can make a big difference in managing your broadcasts smoothly.
Questions/Views:
- What software features are essential for your station? Consider your station’s specific needs, like live streaming, automated playout and scheduling, or advanced audio mixing.
- How user-friendly is the software? Ease of use is crucial, especially for stations with multiple operators.
Examples Case Studies From Our Experiences:
- Internet Radio Station: Mike uses D&R Aircast for its robust features and automation capabilities, which help him manage his station efficiently.
- Community Radio Station: Emily relies on Caliope OnAir for its intuitive interface and extensive feature set, making it easy to train new volunteers.
Choosing the right broadcasting software can streamline your operations and enhance the quality of your broadcasts, ensuring a professional and seamless listening experience for your audience.
Conclusion: Beginner’s Guide to Radiostation Studio Setup
Starting a radio station is an exciting journey that combines passion, creativity and technical know-how. We hope this Beginner’s Guide to Radiostation Studio Setup has helped you navigate the jungle of information. By investing in the right equipment, such as broadcast consoles, microphones, headphones, monitors, audio interfaces and accessories, you are setting yourself up for success. Remember that “cheap is expensive” often applies here too and trust equipment from companies that have been around for years at a high level and do not shop for it on cheap Chinese websites.
In addition, audio processing equipment and broadcast software will help you maintain high sound quality and work efficiently. Remember that each piece of equipment plays a vital role in the overall performance of your station.
Consider your specific needs and budget and don’t hesitate to look for real-world examples and case studies to guide your decisions.
With the right equipment, you are well on your way to high-quality, engaging broadcasts that captivate your audience. To help you further and to give you more inspiration on what to choose and to give you an idea of the prices, we have put together different radio studio sets.
Take a look and put together the perfect package for your radio studio based on your wishes, requirements or budget! From a small home studio to a medium-sized studio for local broadcasting or internet radio to a professional analogue or digital studio for regional radio or commercial broadcasting, you will find it here! Click here for a studio for (almost) every budget!
Still can’t figure it out? Contact us, we are happy to help you and can also put something together based on your wishes, requirements or budget!